How to add Admob Interstitial Ad in Android Studio - Google Ad SDK 20.5.0
In this article we will learn how to integrate Google Admob Interstitial Ad in our android app, so before going to the coding part we will first learn some basics and features of Interstitial
Feature of Interstitial Ads:
Step 1: Create a new Project
Open Your Android Studio Click on "Start a new Android Studio project
Choose "Empty Activity" from the project template window and click Next
Enter the App Name,Package name, save location, language(Java/Kotlin ,we use Java for this tutorial ) and minimum SDK(we are using API 29: Android 4.4 (KitKat) )
Next click on Finish button after filling the above details
Now wait for the project to finish building.
Step 2: Adding the Mobile Ads SDK
To show the ads in our app we have to first implement the Admob sdk in our app ,to do so
Go to Gradle Scripts->build.gradle (Module: app) section and import below dependencies and click the "sync Now" show at the top
In your project-level build.gradle file, include in both your buildscript and allprojects sections:
buildscript {
    repositories {
        google()
        mavenCentral()
    }
}

allprojects {
    repositories {
        google()
        mavenCentral()
    }
}
Step 3: Modify AndroidManifest.xml
<manifest> <uses-permission android:name= "android.permission.INTERNET"/></manifest>
Now we add add our AdMob AppId to your in the Android Mainfest file by adding the <meta-data> tag inside the <application> tag

Step 4: Create activity_main.xml
complete code of activity_main.xml is show below:

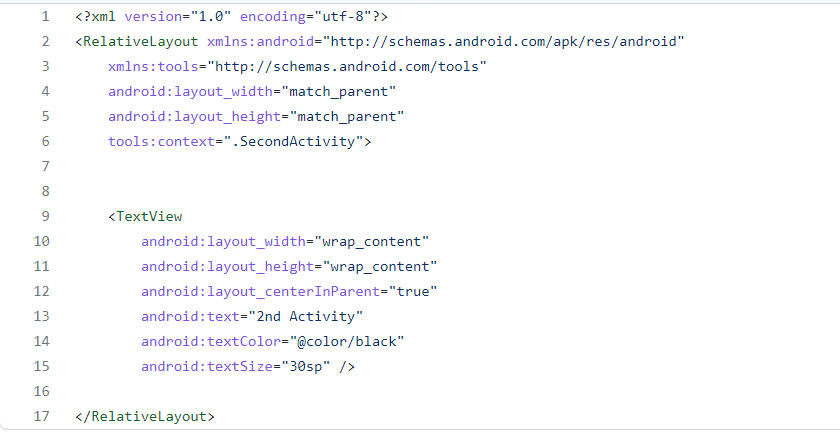
Step 5: Create second_activity.xml
complete code of activity_second.xml is show below:

Step 6: MainActivity.java file
The completed code of MainActivity.java is shown below:

Step 7: SecondActivity.java file
The completed code of SecondActivity.java is shown below:

Comments
Post a Comment